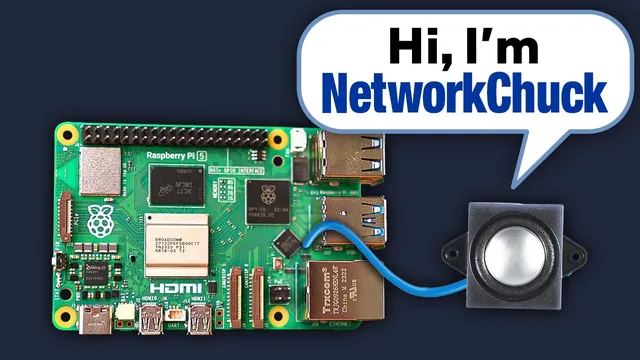
Cloning my Voice Into an AI Assistant
Based on NetworkChuck's video on YouTube. If you like this content, support the original creators by watching, liking and subscribing to their content.
Voice cloning with Piper works best when audio clips are short (~15 seconds), mono, consistently sampled (22.05 kHz), and stripped of music and silence.
Briefing
Cloning a voice locally is possible with open-source tools—if the data is clean and the training pipeline is handled carefully. The core takeaway is that voice quality depends less on “magic” and more on disciplined preprocessing: short, noise-free audio clips; accurate transcriptions; and a training setup that matches the model’s software and hardware requirements.
The workflow starts with building a dataset. For a self-voice, the tutorial uses Piper Recording Studio to capture hundreds of spoken utterances through a microphone, then exports the recordings into Piper’s expected structure: a Wave folder plus a metadata CSV pairing each audio filename with its transcription. The process also requires audio hygiene steps—installing FFmpeg, converting to a consistent format (mono, 22.05 kHz), and removing silence and background artifacts. When pulling voice samples from YouTube instead, the same cleanliness rules apply, but the pipeline adds extra steps: downloading audio with yt-dlp, editing out music and interruptions (with Audacity), stripping silence using FFmpeg, and splitting long recordings into many short segments (no longer than ~15 seconds) so the training data matches Piper’s constraints.
Once the dataset is ready, the pipeline transcribes every clip using Whisper (Local Whisper). A Python script runs Whisper over the Wave directory and outputs a metadata CSV that aligns filenames to transcribed text—an essential requirement for training. After that, the training environment is set up by cloning the Piper repository and installing specific dependency versions. A major pain point appears with GPU compatibility: a CUDA 11.7 requirement caused issues on an NVIDIA 4090 setup, and the fix involved adjusting Piper’s requirements and installing a compatible PyTorch version. The tutorial emphasizes that these version mismatches are a common source of “headaches,” and that getting the dependency stack aligned is as important as the model itself.
Training is done by fine-tuning an existing Piper checkpoint rather than starting from scratch. The script runs a preprocessing step, then trains using the checkpoint downloaded from Hugging Face, with options for GPU acceleration and multi-GPU scaling. The author demonstrates three setups: a laptop with WSL and an NVIDIA 3080, a dual 4090 server for training a second voice, and an AWS EC2 instance with multiple GPUs (a g5.12xlarge) to train another voice in the cloud. Training can be interrupted and resumed by pointing to the latest checkpoint in the lightning logs.
After training completes, the final checkpoint is exported into Onyx format (plus a config JSON). The resulting model can be tested via Piper TTS on the command line, then integrated into a local voice assistant. The tutorial shows deploying the Onyx files to a Home Assistant server using a Samba share, configuring the Piper integration, and refreshing the Wyoming device so the new voice appears. Once wired into the assistant, the cloned voice can be used for conversation and scripted prompts.
Finally, the results highlight a practical reality: even with correct tooling, voice quality varies widely depending on the source clips. The author’s own YouTube-derived dataset produced a poor-sounding clone until the dataset was rebuilt using Piper Recording Studio with a larger number of utterances (hundreds). The “best” clone came from pristine, diverse, well-recorded samples and enough training iterations—turning voice cloning into a data-quality problem rather than a purely technical one.
Cornell Notes
Voice cloning with open-source tools is achievable locally using Piper, but the quality hinges on dataset cleanliness and correct training dependencies. The process builds a dataset (Wave folder + metadata CSV), removes silence and background noise, splits audio into short segments, and uses Local Whisper to transcribe clips into a matching CSV. Training fine-tunes a prebuilt Piper checkpoint, with GPU acceleration and checkpoint-based resume support; dependency/version mismatches (including CUDA/PyTorch issues) can otherwise derail training. After training, the model is exported to Onyx format and integrated into a Home Assistant voice assistant via the Piper integration, requiring correct file naming and device refreshes. The author’s best results came from recording fresh, pristine utterances with Piper Recording Studio rather than relying on imperfect YouTube audio.
Why does the tutorial insist on “clean data” before training a voice clone?
What does Piper Recording Studio produce, and why is that structure important?
How does the pipeline handle YouTube-sourced voice data differently from self-recorded data?
What caused major training failures on an NVIDIA 4090 setup, and how was it resolved?
How does training get sped up and scaled across hardware?
How are the trained voices deployed into a Home Assistant setup?
Review Questions
- What specific dataset artifacts (folder/file types) does Piper require, and how does the tutorial generate them for both self-recorded and YouTube-sourced voices?
- Why might a voice clone sound poor even after successful training, and which preprocessing choices in the tutorial are most likely to fix that?
- How do checkpointing and dependency/version alignment affect the ability to resume training and avoid GPU-related failures?
Key Points
- 1
Voice cloning with Piper works best when audio clips are short (~15 seconds), mono, consistently sampled (22.05 kHz), and stripped of music and silence.
- 2
Piper training requires a Wave folder plus a metadata CSV that maps each audio filename to its transcription; Local Whisper is used to generate that CSV for YouTube-derived data.
- 3
Dependency and hardware compatibility matter: CUDA/PyTorch mismatches (notably CUDA 11.7 issues on NVIDIA 4090) can break training unless requirements are adjusted.
- 4
Fine-tuning a prebuilt Piper checkpoint is faster and more practical than training from scratch, and training can be resumed from the latest checkpoint in lightning logs.
- 5
Training quality depends heavily on source material: pristine, diverse utterances recorded with Piper Recording Studio produced far better results than imperfect YouTube audio in the author’s tests.
- 6
Exported models must be converted to Onyx format (plus config JSON) and then deployed with correct naming into Home Assistant’s Piper integration, followed by add-on/device refreshes so the voice appears.