how to build a HACKING lab (to become a hacker)
Based on NetworkChuck's video on YouTube. If you like this content, support the original creators by watching, liking and subscribing to their content.
Install VirtualBox and use it to run both the attacker (Kali Linux) and the vulnerable target (a VulnHub VM) on the same laptop.
Briefing
A beginner-friendly setup lets people hack real, intentionally vulnerable web servers without exposing their home network—by isolating two virtual machines inside a single laptop and routing their traffic through a private, internal network with its own DHCP server. The core idea is simple: run Kali Linux as the “attacking” machine and a vulnerable target from VulnHub as the “victim,” then prevent both from talking to the outside world or to the host network.
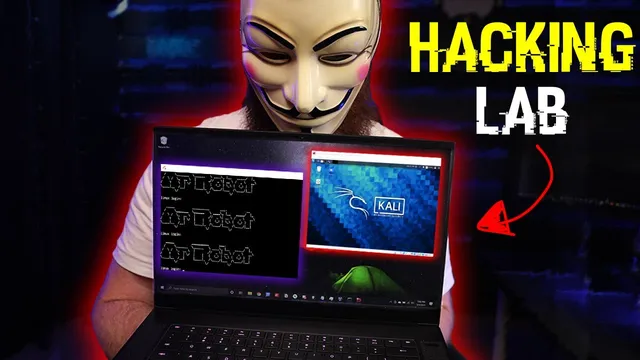
The workflow starts with hardware and tooling requirements. At minimum, the setup calls for a laptop or PC with at least 16GB of RAM and a decent internet connection to download large images. The next step is installing VirtualBox (plus the VirtualBox Extension Pack/manager) to create virtual machines on one computer. Then the environment is built by downloading two VirtualBox-ready images: Kali Linux for the attacker and a vulnerable machine from VulnHub for the target. The transcript specifically chooses a VulnHub “Mr Robot” themed VM (“mr robot”) and notes that these machines are genuinely vulnerable—meaning they should never be placed directly on a real home network.
Isolation is enforced through VirtualBox network settings. Both VMs are placed on an internal VirtualBox network (switching Kali’s adapter from NAT to “internal network” and doing the same for the vulnerable VM). A shared internal network name (e.g., “malfoy”) ensures the two machines can see each other. The critical missing piece is that internal networks don’t automatically provide IP addresses, so the setup creates a DHCP server using VirtualBox’s command-line tool (vboxmanage). The DHCP command defines the internal network name, a server IP, and a pool of assignable addresses (the example uses a 10.38.1.x range with a netmask of 255.255.255.0). After this, both VMs can boot and communicate within the isolated bubble.
To verify safety, the transcript checks connectivity: Kali receives an IP in the internal range (example: 10.38.1.110), but it cannot reach the host’s real home-network IP (example: 10.7.1.144). The vulnerable VM is then started, and Kali runs an Nmap scan (sudo nmap) using a fast TCP SYN scan across the expected internal IP range. The scan finds the target at 10.38.1.111 with open ports 22 (SSH) and 80/443 (web). Opening the target’s IP in a browser confirms it’s a live web service.
Rather than walking through exploitation, the setup ends at the point where learners can take over—framing the challenge as a CTF-style exercise with hidden “flags” that require enumeration, access, and file-system discovery. The emphasis stays on practicing in a contained environment, then moving from one VulnHub target to another once the lab is working reliably.
Cornell Notes
The lab’s goal is to let newcomers hack real vulnerable servers safely on a single laptop by isolating two VirtualBox machines. Kali Linux acts as the attacker, while a VulnHub “Mr Robot” VM acts as the vulnerable target. Both VMs are connected to the same VirtualBox internal network, but a custom DHCP server is created so they can obtain IP addresses. Connectivity checks confirm the attacker can’t reach the host’s real home network. Once Kali gets an IP, Nmap enumeration identifies the target and its open ports (22, 80, 443), setting up a CTF-style challenge where “flags” are found through exploitation and discovery.
Why does the setup insist on an internal network instead of NAT or bridged networking?
What problem does the DHCP server solve in an internal VirtualBox network?
How does the lab verify that the attacker VM is truly isolated from the host network?
What does the Nmap scan reveal, and why does it matter?
Why does the transcript stop after enumeration instead of showing exploitation?
Review Questions
- What exact VirtualBox network changes are made for both Kali and the vulnerable VM, and what shared setting ensures they can communicate?
- How would you confirm that internal-network isolation is working before running any scanning or attacks?
- After Nmap reports ports 22, 80, and 443 on the target, what categories of vulnerabilities would you prioritize first and why?
Key Points
- 1
Install VirtualBox and use it to run both the attacker (Kali Linux) and the vulnerable target (a VulnHub VM) on the same laptop.
- 2
Place both VMs on a VirtualBox “internal network” to prevent them from reaching the host’s real network or the internet.
- 3
Create a DHCP server for the internal network using vboxmanage so the VMs receive IP addresses automatically.
- 4
Verify isolation by checking that Kali cannot ping the host’s home-network IP and that the host cannot reach the Kali internal IP.
- 5
Use Nmap from Kali to enumerate live hosts and open ports within the internal IP range before attempting any exploitation.
- 6
Treat VulnHub targets as genuinely vulnerable and never connect them directly to a real home network.
- 7
Approach the challenge as a CTF: use enumeration and exploitation to locate hidden flags rather than relying on a walkthrough alone.