How to build: Second Brain Notion Template? (+ free template)
Based on The Organized Notebook's video on YouTube. If you like this content, support the original creators by watching, liking and subscribing to their content.
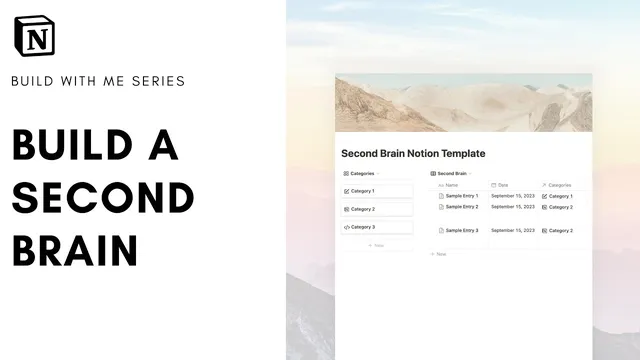
Build the second brain around two linked Notion databases: one for resources and one for categories.
Briefing
A Notion “second brain” template can be built around two linked databases—one for storing resources and one for categories—so every new entry automatically appears in the right place. The core setup pairs a main table (“Second Brain Database”) with a category gallery (“Categories”), connected through a Relation property. That relationship powers filtered category views, letting users browse by category like buttons while still managing a full resource database on the right.
The build starts with an empty Notion page formatted for maximum usable space (small text, full width, minimal cover). Inside it, the main database is created as an inline table named “Second Brain Database,” with the title hidden for a cleaner look. Key properties are added: a “Type” field (e.g., web article, book, idea, movie, academic journal), a “Date” field for when the item was added, a “URL” field for links, and—most importantly—a Relation field that connects each resource to a category. The categories database is then created as a gallery-style set of cards, titled “Categories,” with the title hidden and card preview minimized so each category reads like a button. Each category card (like “notion,” “programming,” or “graphic design”) can include an icon, and the categories database is linked back to the main database via the Relation.
Once both databases are connected, the page layout is rearranged into two columns: the category gallery on the left and the resources table on the right. The next step is template automation. A “Category Template” is created for the categories database using a linked view of the main resources database, filtered by the category. Setting this linked view as the default template ensures that clicking “new” inside categories produces the correct filtered layout automatically. To keep the interface clean, the category property is hidden inside the template since the filtering already makes the category obvious.
After the framework is in place, the template becomes practical for real capture workflows. A “Summary” text property is added to the main database so each resource has a short note alongside the URL. For adding content, the guide emphasizes Notion’s Web Clipper in Chrome: selecting the correct database and saving a page captures the URL and can copy the article’s block text and images, reducing manual effort. Manual entry remains an option—especially for books—using the “URL,” “Type,” “Date,” and “Summary” fields, or embedding content via an embed link.
Finally, the template supports sorting and deeper organization. Resources can be sorted by “Date,” categories can be sorted alphabetically, and additional views can be duplicated and filtered by “Type” to show only specific kinds of items (like web articles). A more advanced grouping option groups entries by “Type,” producing a single view where items are separated into sections automatically. The result is a flexible second brain that starts simple—store and categorize everything—but scales into powerful filtering, grouping, and browsing patterns as the library grows.
Cornell Notes
The template is built from two linked Notion databases: a main “Second Brain Database” for storing resources and a “Categories” gallery for browsing. Each resource includes Type, Date, URL, and a Relation field that links it to a category card. A category template uses a linked view of the main database filtered by the selected category, so new category pages automatically show the right subset of resources. The system becomes useful with capture workflows like the Chrome Web Clipper, which saves URLs and can copy article text and images. Sorting and organization are then handled through view controls—sorting by date and creating filtered or grouped views by Type.
Why does the template use two databases instead of one?
What properties are essential in the main “Second Brain Database”?
How does the category template automatically show the right resources?
What’s the recommended way to capture web content into the system?
How can users organize resources beyond category browsing?
Review Questions
- How do the Relation property and linked view work together to make category pages automatically filtered?
- Which fields in the main database support both capture and later retrieval (sorting/filtering), and what does each field do?
- What are two different ways the template can organize entries besides category selection (e.g., sorting and grouping), and what controls enable them?
Key Points
- 1
Build the second brain around two linked Notion databases: one for resources and one for categories.
- 2
Add Type, Date, URL, and a Relation field to the main resources database so entries can be classified and connected.
- 3
Create a categories gallery view and make each category card act like a clickable button with optional icons.
- 4
Use a category template with a linked view filtered by the category, then set it as the default template for new category pages.
- 5
Add a Summary text property to make each resource entry more useful without opening it.
- 6
Capture web pages using the Chrome Web Clipper to save URLs and pull in article text/images efficiently.
- 7
Use view controls to sort by Date and create filtered or grouped views by Type for faster retrieval.