How to Use Track Changes in Microsoft Word
Based on Research and Analysis's video on YouTube. If you like this content, support the original creators by watching, liking and subscribing to their content.
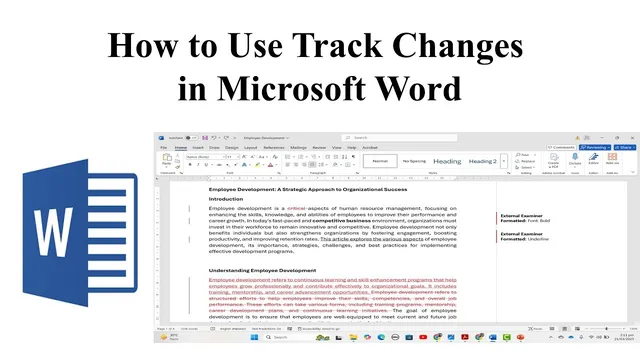
Enable Track Changes from the Review tab to record deletions, insertions, and formatting edits.
Briefing
Track Changes in Microsoft Word is designed to make proofreading exchanges unambiguous by recording every insertion, deletion, and formatting change—then letting the author review, accept, or reject each item. Instead of getting a document back with “so many changes” and no clarity on what changed, the author can turn Track Changes on from the Review tab and see a complete audit trail tied to the document itself.
Activating Track Changes is straightforward: the Review tab’s Track Changes toggle turns the feature on, and it can be turned off at any time by clicking the same control. A small arrow next to Track Changes provides key control options. “Just mine” limits tracking to the current user, while “For everyone” enables tracking for all people who work on the document. There’s also a “Lock tracking” option for documents that shouldn’t be tampered with—once locked, other people can’t disable tracking without the required password. Unlocking later requires re-entering that password, so the change log remains intact.
Once tracking is active, edits automatically appear as marked changes. In the example workflow, changes include deleting text, rewriting lines, and applying italics. After receiving the updated document, the author can switch the display mode from “No markup” to “Simple markup” to highlight only the lines where changes occurred. This mode is useful for a quick scan, showing which sections were affected without exposing every detail.
For deeper inspection, the author changes the view from “Simple markup” to “All markup.” That setting reveals the full breakdown: deleted words are shown as removed, replaced text appears alongside the original-to-new substitution, and formatting changes (like italics) are displayed with clear visual indicators. With the author able to see exactly what was deleted, what was inserted, and what formatting was altered, the document becomes reviewable at a granular level.
Final decisions are handled through the Accept/Reject tools. The author can accept everything at once using “Accept all changes,” or process items individually—accepting one change and rejecting another. Navigation is supported with “Next,” which moves through changes sequentially so decisions can be made efficiently. If the goal is to compare against the pre-edit version, switching the view to “Original” displays the document as it existed before tracked edits were applied. Together, these controls turn Track Changes into a practical system for managing collaborative editing without losing the thread of what changed and why it matters.
Cornell Notes
Track Changes in Microsoft Word records every edit—text deletions, rewrites, and formatting changes—so authors can review exactly what changed after sharing a document for proofreading. The feature is enabled from the Review tab, and it can be set to track only “Just mine” or “For everyone.” “Lock tracking” adds a password gate so collaborators can’t turn tracking off and erase the audit trail. Display options range from “No markup” to “Simple markup” (only changed lines) and “All markup” (full details like deleted words, replacements, and italics). Authors can then accept or reject changes individually or in bulk, navigate with “Next,” and view the pre-edit version using “Original.”
How does an author turn Track Changes on and control who gets tracked?
What does “Lock tracking” do, and why does it matter during collaboration?
What’s the difference between “No markup,” “Simple markup,” and “All markup”?
How can an author decide which changes to keep or remove?
How can the author compare the edited document to the original version?
Review Questions
- When would an author choose “Just mine” instead of “For everyone” for Track Changes?
- Which display mode best supports a quick scan of where edits occurred, and which mode best supports detailed review?
- How do “Accept all changes” and accepting/rejecting changes one-by-one differ in workflow?
Key Points
- 1
Enable Track Changes from the Review tab to record deletions, insertions, and formatting edits.
- 2
Use the Track Changes dropdown to choose “Just mine” for personal tracking or “For everyone” for collaborative tracking.
- 3
Lock tracking with a password to prevent others from disabling change tracking and losing the audit trail.
- 4
Switch between “No markup,” “Simple markup,” and “All markup” to control how much change detail is visible.
- 5
Accept or reject changes individually or in bulk, using “Next” to move through edits efficiently.
- 6
Use the “Original” view to compare the current document against the pre-edit version.