Loading in your own data - Deep Learning basics with Python, TensorFlow and Keras p.2
Based on sentdex's video on YouTube. If you like this content, support the original creators by watching, liking and subscribing to their content.
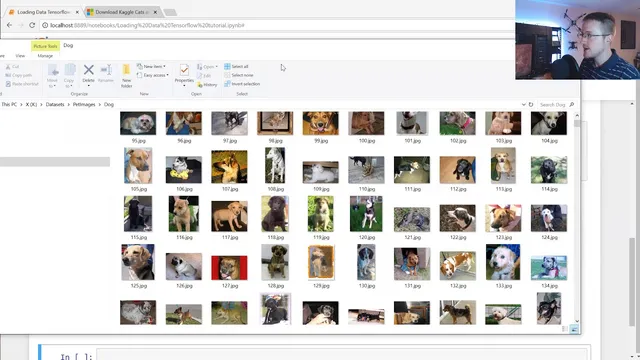
Download and extract the cats and dogs dataset, which is organized into separate cat and dog directories for supervised learning.
Briefing
A practical pipeline for turning the Microsoft “cats and dogs” image dataset into training-ready tensors is the core takeaway, including how to load images from disk, standardize them, assign numeric labels, and prepare shuffled feature/label arrays for a neural network. The workflow matters because deep learning models can’t learn from raw, variably sized images or string labels; they need consistent input shapes and numeric targets.
The process starts with downloading and extracting the dataset, which is organized into two folders—cat and dog—each containing roughly 12,500 images. The code then imports common tooling: NumPy for array work, Matplotlib for quick visual checks, OS for directory traversal, and OpenCV (cv2) for image loading and preprocessing. A base data directory is set (the transcript uses a local path), and a categories list defines the two classes. Using nested loops, the script walks through each category folder and iterates over every image file name.
Each image is read with OpenCV and converted to grayscale. That choice is deliberate: grayscale reduces input size by removing color channels, and the transcript argues color isn’t essential for distinguishing cats from dogs. After conversion, the code visualizes a sample using Matplotlib to confirm the preprocessing worked as expected. It also inspects the grayscale array shape, noting that images vary in dimensions (some are landscape, portrait, or square). To make the dataset uniform, every image is resized to a fixed square size—set to 50×50 in the example—so the model receives consistent input dimensions.
Next comes dataset construction. An empty list collects training samples, and a helper loop assigns labels by mapping categories to numbers: dog becomes 0 and cat becomes 1 (the exact mapping is arbitrary as long as it’s consistent). For each image, the resized grayscale array is appended alongside its numeric label. The transcript mentions that some images can be broken and suggests using try/except to skip problematic files, though the example opts to pass.
Two key training-data hygiene steps follow. First, the dataset should be balanced so neither class dominates; otherwise the model can learn a misleading shortcut (e.g., always predicting the majority class). Second, the data must be shuffled. Without shuffling, the model would see all dogs first and then all cats, which can lead to unstable learning patterns.
Finally, the shuffled list is split into feature and label arrays: X holds image data and Y holds labels. X is converted into a NumPy array and reshaped to match the expected neural-network input format for grayscale images: (number_of_samples, image_size, image_size, 1). The transcript also flags that color images would require a different channel dimension (changing the final “1” to “3”). To avoid repeating expensive preprocessing every training run, the prepared X and Y are saved using pickle for later reuse. The next tutorial step is then to feed this compiled dataset into a convolutional neural network for classification and evaluate accuracy.
Cornell Notes
The workflow standardizes a cats-vs-dogs image dataset into model-ready inputs. Images are loaded from cat and dog directories, converted to grayscale, resized to a fixed 50×50 shape, and paired with numeric labels (dog=0, cat=1). The combined samples are shuffled to prevent the model from learning ordering artifacts, then split into X (features) and Y (labels). X is converted to a NumPy array and reshaped to (N, 50, 50, 1) for grayscale, where the last dimension represents the single channel. Saving X and Y with pickle avoids repeating preprocessing when experimenting with model architectures.
Why convert images to grayscale before training, and what computational benefit does it bring?
How does resizing solve the “variable image shape” problem in image classification?
Why must labels be numeric, and how are dog and cat mapped in this pipeline?
What goes wrong if training data isn’t shuffled, given the way the dataset is built?
How does class imbalance affect learning, and what mitigation is suggested?
What input shape does the code produce for grayscale images, and how would it change for color?
Review Questions
- What preprocessing steps are required to make variable-sized images usable by a convolutional neural network?
- Explain why shuffling is necessary when the dataset is created by iterating over category folders.
- If dog=0 and cat=1, what does Y represent and why can’t Y contain strings?
Key Points
- 1
Download and extract the cats and dogs dataset, which is organized into separate cat and dog directories for supervised learning.
- 2
Load each image with OpenCV and convert it to grayscale to reduce input dimensionality and simplify the classification task.
- 3
Resize every image to a fixed size (50×50 in the example) so all training samples share identical height and width.
- 4
Map class names to numeric labels (dog=0, cat=1) because neural networks require numeric targets.
- 5
Build training samples as (image_array, label) pairs, then shuffle the dataset to avoid learning artifacts from folder order.
- 6
Reshape feature arrays into (N, image_size, image_size, 1) for grayscale so they match convolutional network input expectations.
- 7
Save preprocessed X and Y with pickle to avoid repeating expensive image loading, resizing, and reshaping during model iteration.