Making Feature Patterns in Solid Edge
Based on matt lombard's video on YouTube. If you like this content, support the original creators by watching, liking and subscribing to their content.
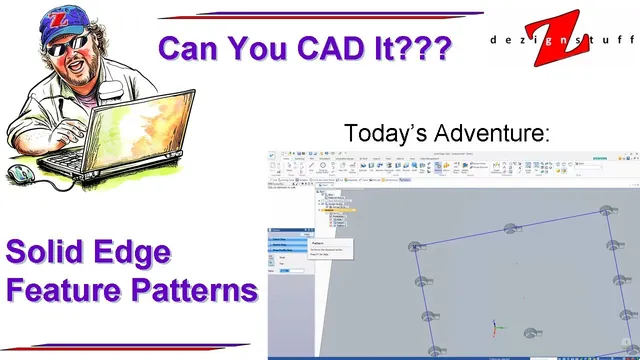
Solid Edge’s pattern workflow starts with selecting a feature, then creating a pattern definition sketch step that uses pattern-specific tools.
Briefing
Solid Edge’s patterning tools can replicate many familiar “linear pattern” workflows from other CAD systems, but they work best when users lean on Solid Edge’s dedicated pattern-specific sketch tools rather than trying to force standard sketch commands into the job. Patterning starts from a feature selection (for example, a hole), then Solid Edge prompts for a pattern definition that begins with a sketch-like step. For rectangular and circular patterns, the key is to use Solid Edge’s rectangular pattern and circular pattern tools—these behave like sketch tools, but they are not the same as regular sketch functions.
A typical rectangular pattern workflow begins by selecting the target feature, accepting the selection, and then creating the pattern sketch on a plane. Users draw a rectangle with the rectangular pattern tool, then control the pattern layout using numeric options. To mimic a linear pattern, one of the pattern dimensions is set to 1 (for instance, a 3-by-5 layout uses the appropriate row/column counts). Solid Edge also supports staggered layouts via row or column offsets, letting occurrences shift relative to each other. Reference point selection matters: if the reference point isn’t selected, Solid Edge highlights it as required, and users can suppress individual occurrences by interacting with the blue dots. If suppressed occurrences need to be restored, right-clicking returns to the pattern interface.
Solid Edge provides three spacing/occurrence modes for patterns: Fixed, Fit, and Fill. Fixed requires explicit spacing and occurrence counts. Fit uses the overall size of the pattern sketch to determine how many occurrences fit, and it can also rotate the pattern. Fill similarly aims to populate the pattern area based on the sketch geometry, with Solid Edge managing how occurrences are distributed. After previewing and finishing, users can refine the pattern by editing its definition—such as adding a small keyway by selecting the cut face as part of the step definition. Editing the pattern definition can also be used to return to the sketch stage, though some options may change once the workflow moves between definition and sketch editing.
For more complex layouts, Solid Edge supports curve-driven patterns. The process starts with selecting the feature to pattern, then selecting a curve to define the path. An anchor point—typically the end of the curve—establishes how the pattern is positioned along the curve. Spacing can be controlled using modes such as Fit, Fixed, or chord-length style inputs, followed by preview and finish.
The most data-driven option is pattern by table. Users select the feature(s) to replicate and choose a coordinate system, then link an Excel file that supplies an instance table. The table includes x and y positions relative to the part coordinate system (or another established reference point) and rotation values in degrees. After saving and linking the Excel file, Solid Edge imports the instance data and generates rotated occurrences accordingly. Across these three approaches—rectangular/circular patterning, curve-driven patterns, and Excel-driven instance tables—the core takeaway is to use Solid Edge’s dedicated pattern tools and choose the pattern mode that matches whether the goal is fixed spacing, overall fit, or table-controlled placement.
Cornell Notes
Solid Edge patterning is built around three main workflows: rectangular/circular patterns, curve-driven patterns, and pattern-by-table using Excel. Rectangular patterns use dedicated rectangular/circular pattern sketch tools; to mimic a linear pattern, set one dimension to 1 (e.g., 3-by-5). Pattern spacing can be controlled with Fixed, Fit, or Fill, and patterns can be edited later by selecting faces or sketches as part of the step definition. Curve-driven patterns replicate features along a spline or other curve using an anchor point and spacing mode. Pattern by table links an Excel instance table with x/y coordinates and rotation angles to generate precisely positioned, rotated occurrences.
Why does Solid Edge require dedicated rectangular/circular pattern sketch tools instead of standard sketch tools?
How can a rectangular pattern be turned into what other CAD tools call a linear pattern?
What do Fixed, Fit, and Fill change about how occurrences are generated?
How does a curve-driven pattern determine where and how features repeat?
What information must an Excel file provide for pattern by table?
Review Questions
- When editing a pattern definition to add a new feature (like a keyway), what selection changes are needed to target the correct face or cutout geometry?
- In curve-driven patterning, what role does the anchor point play compared with the curve selection?
- For pattern by table, how do coordinate system choice and the Excel-provided x/y/rotation values combine to place and orient each instance?
Key Points
- 1
Solid Edge’s pattern workflow starts with selecting a feature, then creating a pattern definition sketch step that uses pattern-specific tools.
- 2
Rectangular and circular patterns require the dedicated rectangular/circular pattern sketch tools; standard sketch tools won’t produce the expected pattern definition.
- 3
To mimic a linear pattern using a rectangular pattern, set one of the pattern dimensions to 1.
- 4
Pattern spacing and occurrence behavior can be controlled with Fixed, Fit, and Fill, which differ in whether spacing or overall size drives the instance count.
- 5
Curve-driven patterns rely on selecting a curve plus an anchor point to establish how instances distribute along the path.
- 6
Pattern by table uses a linked Excel instance table containing x/y coordinates and rotation angles in degrees to generate precisely placed, rotated occurrences.