Minecraft run SHADERS on a low end PC!
Based on MattVidPro's video on YouTube. If you like this content, support the original creators by watching, liking and subscribing to their content.
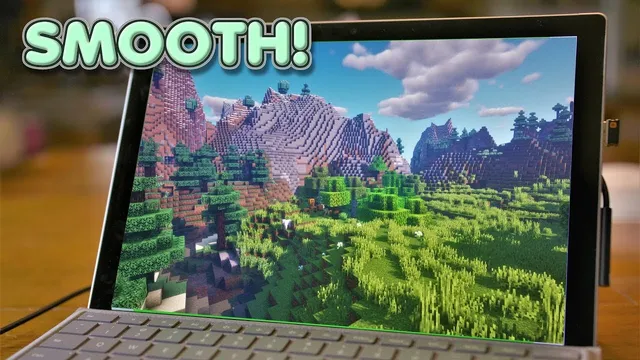
Plug the Surface Pro 6 in and switch to Best performance to maximize available CPU/GPU power for shaders.
Briefing
Running Minecraft shaders on a low-end Surface Pro 6 is possible—but only after stacking the right performance tweaks. The core breakthrough is using OptiFine (a Minecraft mod) to unlock shader support and then aggressively rebalancing settings: lower resolution and frame rate caps, disable expensive visual effects, and tune chunk/render distance so the game stays “playable” instead of slideshow-lag.
The process starts with power and system resources. The Surface Pro 6 should be plugged in and set to Best performance so it can draw maximum power and use more CPU/GPU capacity. In Minecraft, the workflow begins by installing a compatible version (the walkthrough uses 1.14) and then installing OptiFine for that version (downloaded as OptiFine 1.14.4). After OptiFine is installed, the launcher’s JVM arguments are adjusted to allocate more RAM to Minecraft—changing xmx from 2g to xmx 6g on a machine with 8GB total RAM.
Once Minecraft is running through the OptiFine profile, the next bottleneck is background load. Task Manager is checked to confirm Minecraft is the main heavy process; anything like Chrome should be closed because it steals CPU/GPU time. With the system stabilized, the shader step comes next: download a lower-end shader pack (the walkthrough uses “Solders Vibrant Shaders,” selecting the medium option rather than lighter or heavier variants), then drag the shader ZIP into Minecraft’s shader folder. Shaders may appear to run but still look extremely laggy at first.
The real fix is dialing in settings in two places: Minecraft video settings and shader-specific options. The walkthrough lowers the frame rate cap (starting at 30 FPS), turns off smooth lighting, sets clouds to fast, disables fog, and turns off many animation and quality features (including custom entity models, connected textures, and random entities). It also uses full-screen but at a reduced effective resolution to lighten the rendering load.
Performance settings are then tuned for compatibility with shaders: smooth FPS is avoided because it’s not compatible, and chunk-related options are pushed toward the lowest levels (lazy chunk loading and low chunk updates). On the shader side, expensive effects like bloom and depth of field are disabled, reflections and other screen-space effects are turned off, and shadows are reduced to a minimal level (grass shadows, with additional shadow options turned off where possible).
After these changes, the game shifts from “very very laggy” to a genuinely playable state. The walkthrough notes a successful outcome even with shaders enabled at a chunk setting that initially lands around 12 chunks, and it improves further by reducing chunk count (down to 8) for smoother play. The final result is not “big PC shader” quality, but it demonstrates a practical path from unplayable to functional shaders on a tablet-class device.
Cornell Notes
Shaders on a Surface Pro 6 become workable by combining OptiFine with strict performance tuning. OptiFine (for Minecraft 1.14.4) enables shader support and also allows JVM RAM allocation; the walkthrough increases xmx to 6GB. After launching the OptiFine profile, the system is kept lean by closing background apps and checking Task Manager. In-game settings are then reduced: cap FPS (e.g., 30), disable smooth lighting, fog, many animations, and several quality features, and lower effective resolution. Finally, shader options are trimmed—turning off bloom, depth of field, reflections, and setting shadows very low—while chunk/render distance is reduced (e.g., down to 8 chunks) to reach playable performance.
Why does Minecraft shaders fail on a Surface Pro 6, and what software change makes shaders possible?
How should RAM and power be handled before chasing shader settings?
What’s the fastest way to prevent background apps from ruining shader performance?
Which shader packs are most realistic for low-end hardware, and how are they installed?
What specific setting changes turn shaders from “laggy” into “playable”?
Review Questions
- What two categories of changes—system-level and in-Minecraft—are required to make shaders run on a tablet-class PC?
- Which OptiFine-related setting in the launcher affects performance most directly in the walkthrough, and what value is used?
- List at least five visual effects or quality options that were disabled to improve frame rate with shaders enabled.
Key Points
- 1
Plug the Surface Pro 6 in and switch to Best performance to maximize available CPU/GPU power for shaders.
- 2
Install OptiFine for the exact Minecraft version used (the walkthrough uses Minecraft 1.14 with OptiFine 1.14.4) to enable shader support.
- 3
Increase Minecraft’s allocated RAM via JVM arguments (xmx 2g to xmx 6g in the walkthrough) based on total system memory.
- 4
Close background apps and verify in Task Manager that Minecraft is the main resource consumer before testing shaders.
- 5
Start with lower-end shader packs (e.g., medium rather than heavier options) to avoid immediate slideshow performance.
- 6
Cap FPS, lower effective resolution, disable fog/smooth lighting, and turn off multiple animations and quality features to stabilize frame rate.
- 7
Trim shader-specific effects (bloom, depth of field, reflections) and reduce chunk/render distance (e.g., down to 8 chunks) to reach playable performance.