Solve Arduino Bootloader Burning Problem
Based on Shuvangkar Das, PhD's video on YouTube. If you like this content, support the original creators by watching, liking and subscribing to their content.
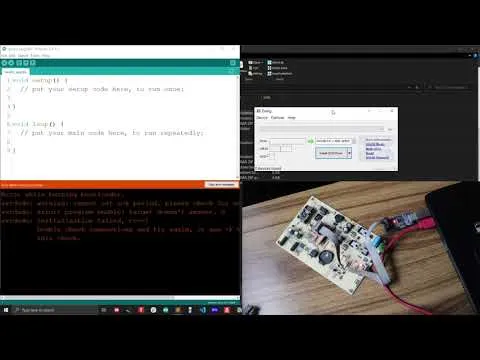
Set Programmer to “USB asp” and Board to “Arduino Uno” in the Arduino IDE before burning the bootloader on an ATmega328-based custom board.
Briefing
Custom Arduino boards built around an ATmega328 often need a bootloader burned before the Arduino IDE can upload sketches. A common failure point is the “burn bootloader” step in the Arduino IDE when using a USB programmer such as USBasp. In one typical setup, the Arduino IDE is configured with Programmer = “USBasp” and Board = “Arduino Uno,” then the “Burn Bootloader” command is triggered. Instead of completing, the process can stall or fail due to a driver-related error—described as a recurring “none as the driver problem” that shows up intermittently.
The practical fix is to update the USBasp driver on the computer. The workflow starts by downloading the driver installation software (the transcript references “zd dot ake o dot ie” as the download source). After launching the installer, the user selects an option to load or install all drivers and then filters the device list to find the USBasp entry. The current driver is identified (shown as “lib usb0” in the transcript), and then replaced via a dropdown selection with a different driver choice. The key change recommended is switching to “lib usb k” (the transcript also notes that trying “lib usb” can work in some cases). Once the driver is replaced, the installation process needs a few minutes to complete before retrying the bootloader burn.
A second hardware-related issue can prevent bootloader burning on fresh ATmega328 chips. When a new ATmega328 is running at its default internal clock, it may operate at about 1 MHz. If the USBasp’s SPI (SBI in the transcript) communication runs too fast for that clock rate, the bootloader burn can fail. The remedy is to slow down the SPI communication by using the programmer’s speed/connection options: the transcript specifically mentions a two-pin connection on the USBasp adapter and instructs to connect/shorten those two pins so the SPI communication proceeds at a slower speed suitable for a 1 MHz microcontroller. This adjustment is framed as especially relevant when burning bootloaders into new ATmega328 units.
After updating the USBasp driver and, when needed, adjusting the SPI speed for 1 MHz operation, the bootloader burn completes successfully. The overall takeaway is that bootloader burning problems with USBasp usually come down to either a mismatched or outdated USBasp driver on the host system, or an SPI speed mismatch caused by the target chip’s initial clock speed.
Cornell Notes
Burning a bootloader onto a custom Arduino board using USBasp can fail for two main reasons: host-side driver issues and target-side clock/SPI speed mismatch. When the Arduino IDE’s “Burn Bootloader” step errors out, updating the USBasp driver is the first fix—install the driver package, select the USBasp device, and switch from the current driver (e.g., “lib usb0”) to “lib usb k” (or “lib usb” if that works). If the target ATmega328 is new and running at about 1 MHz, SPI communication may be too fast, so the USBasp needs to be configured for slower speed by using the two-pin connection/short. Retrying after these changes typically results in a successful bootloader burn.
What settings are used in the Arduino IDE before attempting to burn a bootloader with USBasp?
What is the most common host-side cause of bootloader burning failures mentioned, and how is it fixed?
Why can a new ATmega328 fail to accept a bootloader even when the programmer is connected correctly?
How does the transcript recommend slowing down SPI communication for a 1 MHz ATmega328?
What sequence of troubleshooting steps leads to a successful bootloader burn in this guide?
Review Questions
- If the Arduino IDE reports a driver-related error when burning a bootloader with USBasp, what specific driver change is recommended?
- What clock-speed condition on a new ATmega328 makes SPI communication speed adjustments necessary?
- What hardware modification on the USBasp adapter is used to slow down SPI/SBI communication?
Key Points
- 1
Set Programmer to “USB asp” and Board to “Arduino Uno” in the Arduino IDE before burning the bootloader on an ATmega328-based custom board.
- 2
Driver-related failures during “Burn Bootloader” are often resolved by updating the USBasp driver on the host system.
- 3
In the driver update process, locate the USBasp device and replace the current driver (e.g., “lib usb0”) with “lib usb k.”
- 4
After changing the driver, allow the installation process to complete before retrying the bootloader burn.
- 5
New ATmega328 chips may run at about 1 MHz by default, which can make SPI/SBI communication too fast for bootloader burning.
- 6
Configure USBasp for slower SPI by using the two-pin connection/short so the programmer communicates at a speed compatible with 1 MHz operation.
- 7
Retry “Burn Bootloader” after both driver and speed adjustments to achieve a successful burn.