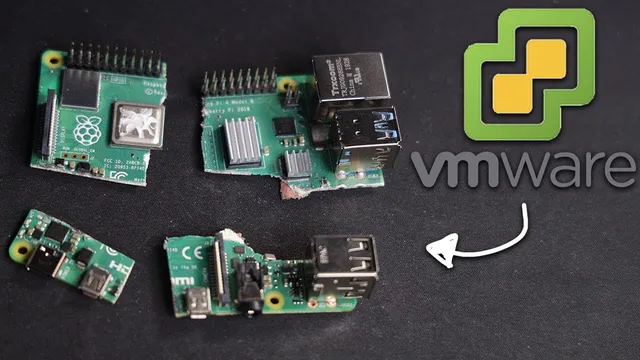
VMware on a Raspberry Pi!?!?! (ESXi Install)
Based on NetworkChuck's video on YouTube. If you like this content, support the original creators by watching, liking and subscribing to their content.
ESXi can be installed on a Raspberry Pi by preparing the microSD with Raspberry Pi firmware and UEFI files, then booting an ESXi ARM installer ISO from USB.
Briefing
Running VMware ESXi on a Raspberry Pi turns a credit-card-sized computer into a small, server-style virtualization host—complete with vSphere management, multiple virtual machines, and even clustering across several Pis. The core takeaway is that ESXi (a type-1 hypervisor) can be installed onto the Pi’s storage media and then managed through VMware’s familiar web interface, letting learners practice enterprise virtualization concepts without the cost and complexity of traditional lab hardware.
The walkthrough starts by “slicing” the Raspberry Pi’s hardware resources—CPU, memory, and storage—so multiple guest operating systems can run at the same time on one physical device. After that framing, the process becomes practical: the Pi is prepared with Raspberry Pi OS Lite, updated over the network, then the microSD card is erased and repopulated with Raspberry Pi firmware files (including both standard firmware and UEFI firmware). A key configuration tweak is added to the firmware’s config.txt: setting gpu_mem to 16 to optimize the Pi for the ESXi environment.
ESXi installation then shifts to removable media. A VMware ESXi ARM installer ISO is downloaded from VMware using a free account, written to a small USB flash drive (with Rufus on Windows, Etcher on macOS, or equivalent tools on Linux), and booted on the Pi. Before the installer runs, the Pi’s firmware settings are adjusted to remove a RAM limitation: the configuration menu shows only 3GB available on an 8GB Pi, so that cap is disabled and the system is rebooted. During boot, the installer command is modified with auto partitioning and a specified OS data size (set to 8192MB) so ESXi doesn’t consume the entire USB drive—leaving space for virtual machine storage.
After ESXi is installed to the larger USB drive, the Pi is rebooted and the boot order is changed so the system starts from the ESXi USB device. From there, the ESXi web portal is accessed over Ethernet using the Pi’s DHCP-provided IP address. Login uses the root account and the password set during installation, and a datastore is available for VM files.
The next phase demonstrates real virtualization: ARM-compatible OS images (such as Ubuntu Server for ARM) are uploaded to the datastore as ISO media, then a new VM is created and powered on. Additional VMs are added to show that the Pi can host multiple workloads at once—though performance is naturally limited by the hardware. The workflow also scales out: two Raspberry Pis can be managed together via vCenter, then grouped into a cluster (the “twins”) for higher-level management features.
Finally, the guide addresses storage constraints common to small hosts. Network-attached storage (example: Synology via NFS) is suggested for running VMs more reliably. When local USB storage is needed, VMware’s USB arbitrator is disabled via SSH so a plugged-in USB drive can be used as an ESXi datastore instead of being passed through to virtual machines. The result is a functional, expandable ESXi lab built from inexpensive hardware—ideal for learning vSphere, storage concepts, and clustering without enterprise equipment.
Cornell Notes
The process demonstrates how to install VMware ESXi (a type-1 hypervisor) on a Raspberry Pi by preparing the microSD card with the right Raspberry Pi firmware/UEFI files, then booting an ESXi ARM installer ISO from a USB flash drive. A crucial step disables a RAM cap in the Pi configuration so an 8GB Pi can use its full memory. ESXi is installed to a larger USB drive with auto-partitioning set so the hypervisor doesn’t consume all space, leaving room for VM storage. After installation, the ESXi web portal is accessed over Ethernet, ARM-compatible ISOs (like Ubuntu Server for ARM) are used to create and run virtual machines, and multiple Pis can be managed and clustered through vCenter. This matters because it enables hands-on enterprise virtualization practice on low-cost hardware.
Why does the guide emphasize firmware/UEFI preparation before installing ESXi?
What RAM issue appears on an 8GB Raspberry Pi, and how is it fixed?
How does the installer avoid consuming the entire USB drive?
How are virtual machines created and installed after ESXi is up?
What’s the purpose of disabling the USB arbitrator?
How does scaling beyond one Pi work in this setup?
Review Questions
- What specific firmware and config steps on the microSD card are necessary before booting the ESXi installer?
- Why is the ESXi installer command modified with auto partition and an OS data size value, and what problem does it prevent?
- How does disabling the USB arbitrator change how USB devices can be used on the ESXi host?
Key Points
- 1
ESXi can be installed on a Raspberry Pi by preparing the microSD with Raspberry Pi firmware and UEFI files, then booting an ESXi ARM installer ISO from USB.
- 2
An 8GB Raspberry Pi may show only 3GB due to a RAM limit setting; disabling that cap is required before installation.
- 3
Use auto partition with an OS data size of 8192MB so ESXi doesn’t fill the entire USB drive and leave space for VM storage.
- 4
After installation, manage the host through the ESXi web portal over Ethernet, then create VMs using ARM-compatible ISOs stored on the datastore.
- 5
vCenter can manage multiple Pi-based ESXi hosts and group them into a cluster for lab-style enterprise virtualization practice.
- 6
For additional local storage, stop and disable the usb arbitrator so USB drives can be formatted into VMFS datastores instead of being passed through to VMs.
- 7
Network storage (e.g., NFS from a NAS like Synology) is presented as a practical way to overcome flash/USB storage limitations on small hosts.