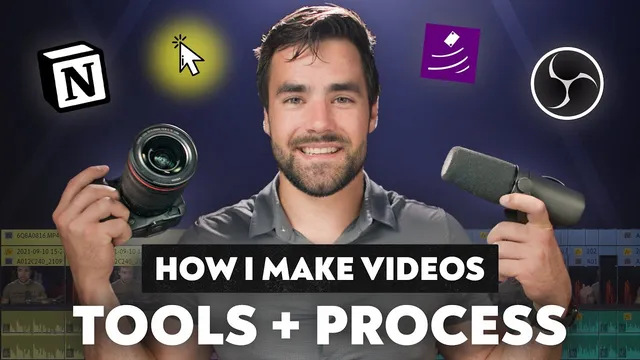
How I Make Notion Tutorials: Apps, Tools, and Process!
Based on Thomas Frank Explains's video on YouTube. If you like this content, support the original creators by watching, liking and subscribing to their content.
Record voiceover in Adobe Audition to get standalone WAV files that are easier to sync and recover if OBS audio has issues.
Briefing
High-quality software tutorials come from treating audio, screen capture, and face-cam footage as separate, editable assets—then assembling them in post with a disciplined workflow. The process centers on recording voiceover in Adobe Audition for cleaner, standalone WAV files, while screen activity is captured in OBS Studio at 4K. That split matters because it protects the final edit from common failure modes (like audio issues in OBS) and gives maximum flexibility when syncing, cutting, and rebalancing in Premiere Pro.
On the screen-capture side, OBS is configured to record only the exact Notion area that should appear to viewers. Instead of relying on heavy “punch in” editing later, the Notion window is positioned to fit the OBS frame, and the Notion interface is zoomed using Control + Plus until the UI is readable at typical YouTube or phone viewing sizes. The sidebar is collapsed for this specific tutorial, and the zoom level is chosen by mentally simulating how a viewer sees the smaller player window. To make interaction cues unmistakable, two helper tools are used: Mouse Highlight, which visually tracks the cursor and also mitigates an OBS cursor invisibility bug in text-selection mode, and Carnac, which overlays keyboard shortcuts (like Control + C) at a consistent on-screen location.
The face-cam approach also prioritizes edit control. Rather than recording face footage with Loom, the workflow uses a Canon C70 camera with a 20 millimeter lens positioned above the monitor. This produces higher-quality video and—crucially—lets the face-cam be moved, resized, masked, or even temporarily hidden so it doesn’t block UI elements. The assembled edit can therefore show the face cam larger when narration needs it, or cut to face-only when the UI isn’t the focus.
Lighting and audio gear are built around reliability and sound quality. Aputure 300D Mark 2 lighting with the Light Dome and grid provides soft diffusion and directional control, while a Shure SM7B handles the main voiceover through a Focusrite Scarlett 18i8 audio interface (with a Cloudlifter used to boost gain for the SM7B). A Schoeps CMC641 (Hyper Cardiod) shotgun-style mic sits as a high-end backup and can be used when the main mic shouldn’t appear in frame. The lighting stack includes a reflective bounce card for facial fill, a Godox light with a Furnale modifier for hair light, and Nanlite Pavotubes for colored background ambiance.
After recording, footage is organized using a centralized server folder structure tied to Notion. A numbering system links Notion “completed projects” to the correct server assets, enabling quick retrieval of B-roll from other projects. Editing begins from a pre-built Premiere Pro template (Creator’s companion-style defaults), which already includes intro stings, titles, and common elements suited to TF explains’ more formulaic structure.
Because Premiere Pro can be slow with high-resolution media, the workflow uses proxies: ProRes-quality 4K screen and 4K face-cam files are edited via lower-resolution proxy versions, then swapped back to full quality at the end. Audio previews and WAV forms are generated to sync multiple audio tracks, and the face-cam is masked and positioned using copied clip attributes. The result is a tutorial timeline that’s ready for final cutting, with the template and asset structure reducing repetitive setup work.
Cornell Notes
The workflow for TF explains tutorials separates voiceover, screen recording, and camera footage so each element can be edited, synced, and repositioned independently. Voiceover is recorded in Adobe Audition as standalone WAV files, while OBS Studio captures a 4K screen region sized and zoomed so the Notion UI remains readable at typical viewer sizes. Helper tools—Mouse Highlight and Carnac—make cursor movement and keystrokes visible, addressing OBS cursor quirks. Face-cam is recorded with a Canon C70 camera, enabling flexible face-cam placement and masking in post. In Premiere Pro, a default template plus proxy editing (for large ProRes files) speeds up timeline work, then WAV forms and audio track mixer settings help sync and finalize the edit.
Why record voiceover in Adobe Audition instead of relying on OBS audio?
How does the workflow ensure the Notion UI is readable without heavy post “punch-ins”?
What roles do Mouse Highlight and Carnac play during screen recordings?
Why record face-cam with a dedicated camera instead of Loom?
How does the workflow keep Premiere Pro editing manageable with large ProRes files?
How does the workflow use Notion to organize and retrieve assets during editing?
Review Questions
- What specific problems does the workflow try to prevent by recording voiceover as standalone WAV files and using Audition instead of OBS audio?
- How do zoom level, window positioning, and sidebar visibility work together to keep the Notion UI readable for viewers on smaller screens?
- Describe how proxies and WAV-form generation support syncing and editing speed in Premiere Pro for large ProRes media.
Key Points
- 1
Record voiceover in Adobe Audition to get standalone WAV files that are easier to sync and recover if OBS audio has issues.
- 2
Capture only the intended Notion region in OBS and zoom the UI (via Control + Plus) so the interface remains readable at typical YouTube or phone sizes.
- 3
Use Mouse Highlight to make cursor movement visible and to work around OBS cursor invisibility in Notion text-selection mode.
- 4
Overlay keystrokes with Carnac so viewers can follow shortcuts like Control + C without guessing.
- 5
Record face-cam with a dedicated camera (Canon C70) to enable post-production repositioning, masking, and face-only cuts without blocking UI.
- 6
Organize assets using a Notion-to-server numbering system so B-roll and project files can be found quickly and consistently.
- 7
Speed up Premiere Pro editing by working with proxy files while syncing audio using generated waveform previews.