How to use Notion for Task Management
Based on Easlo's video on YouTube. If you like this content, support the original creators by watching, liking and subscribing to their content.
Build one Notion table database for tasks, then create multiple views from the same data rather than duplicating task records.
Briefing
A Notion task manager can be built around a single task database, then multiplied into multiple purpose-built views—an inbox for new work, day-by-day columns for scheduling, a timeline for time awareness, and a grouped table for completed items. The core move is creating a table database with the right properties up front, then using templates and filters so every new task automatically lands in the right workflow.
The setup starts by turning the page into a full-width layout and creating a database in table form so properties are visible as they’re added. Key fields include a Date property for due date and time, a text property for task description/notes, and a checkbox property to mark completion. For prioritization, a Select property is used so tasks can be filtered by priority levels such as P0/P1/P2 or High/Medium/Low. Additional Select properties like energy level or context can be added if they match how the user thinks about work. A Created Time property is also included so an inbox view can be driven by when tasks were created rather than manually tagging them.
To reduce friction when adding tasks, a default template is created for the task database. The template pre-fills an icon and can pre-fill the page body, and it can include a calendar element on every task page. The calendar is created by copying the task database link, editing the template, switching the layout to Calendar, and toggling the checkbox property so completion status is visible. Empty template pages are deleted afterward, and the template is set as the default so new tasks don’t appear blank or missing the intended layout.
Once the database and template are stable, the same underlying data is reshaped into multiple views. First, the original database is turned into a page with a list view that becomes the inbox. This inbox uses advanced filters to show tasks that are not completed (checkbox unchecked), have no due date (date empty), and were created today (Created Time is today). As tasks enter the system, they automatically appear here until they’re scheduled.
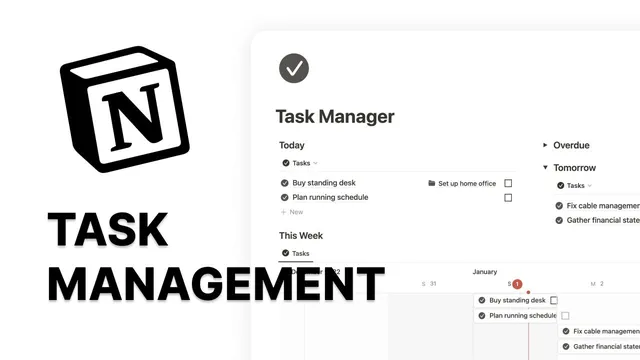
Next comes a two-column scheduling section. One column shows “today” by filtering to tasks due today and hiding the date property; the other column is a stack of toggled views for overdue, tomorrow, and the next seven days. Overdue tasks use a “before today” date filter, tomorrow uses a “tomorrow” filter, and the week view uses a “next week” range while keeping the date property visible for clarity.
A timeline view adds another layer of planning. It’s created by switching a list view to Timeline layout and filtering to the current week with the completion checkbox unchecked, preventing the timeline from becoming unwieldy. For unscheduled tasks, a bottom section pairs a list view filtered to empty due dates with a calendar view; drag-and-drop between them makes it easy to assign due dates.
Finally, completed work is handled in a dedicated table view. The table is customized for readability, vertical lines are hidden, tasks are grouped by month using the assigned date, empty groups are removed, and a filter shows only tasks with the completion checkbox checked. The result is a single Notion system where tasks flow from inbox to schedule to completion through filters, templates, and view layouts—without duplicating data.
Cornell Notes
The task manager is built on one Notion table database, then turned into multiple views that match a workflow: inbox, scheduling columns, timeline planning, drag-and-drop scheduling, and a completed-task table. Core properties include Date (due date/time), text (description/notes), checkbox (completed), Select (priority and optionally energy/context), and Created Time (to power the inbox). A default page template pre-fills an icon and includes a calendar on each task page, so new tasks start consistently. Advanced filters drive each view—for example, the inbox shows tasks created today with completion unchecked and due date empty. Grouping and table customization keep completed tasks readable by month.
What database properties make the workflow possible without manual tagging?
How does the inbox view decide which tasks belong there?
Why create a default template for new tasks, and what should it include?
How are the scheduling columns structured to handle today, overdue, tomorrow, and the next week?
What’s the purpose of the timeline view, and how is it kept from becoming cluttered?
How does drag-and-drop scheduling work for unscheduled tasks?
Review Questions
- Which three conditions must be combined in the advanced filter to make the inbox view work correctly?
- How does the default template reduce setup time when creating new tasks, and what elements does it include?
- What date filters would you use to create views for overdue tasks, tomorrow, and the next seven days?
Key Points
- 1
Build one Notion table database for tasks, then create multiple views from the same data rather than duplicating task records.
- 2
Use Date (due date/time), text (description), checkbox (completed), Select (priority), and Created Time (inbox logic) as the core properties.
- 3
Create a default task template that pre-fills an icon and includes a calendar on each task page to keep task entry consistent.
- 4
Drive the inbox with advanced filters: completed unchecked, due date empty, and Created Time equal to today.
- 5
Use a two-column scheduling layout with toggled views for overdue, today, tomorrow, and the next seven days, each powered by date filters.
- 6
Keep the timeline view focused by filtering to the current week and excluding completed tasks (checkbox unchecked).
- 7
Handle unscheduled tasks with a list filtered to empty due dates paired with an unfiltered calendar view for drag-and-drop scheduling.